Home Assistant (MQTT)
Instead of the native integration, the WattWächter Plus can also be connected to Home Assistant via MQTT. The device then publishes its readings to a broker itself and announces them via auto-discovery — Home Assistant creates the sensors automatically, with no YAML configuration.
Two ways to Home Assistant
- Native integration — included in Home Assistant Core since Home Assistant 2026.7, set up in two clicks, but with a fixed polling interval of 120 seconds. See Home Assistant (Integration).
- MQTT (this page) — a bit more effort (a broker is required), but you decide the publish interval yourself, down to 1 second.
Use only one of the two at a time, otherwise duplicate entities appear — Home Assistant does not warn you about this.
When is MQTT worth it?
The native integration polls the values every 120 seconds; this interval is fixed by Home Assistant. For consumption statistics and the energy dashboard that is perfectly sufficient.
Reach for MQTT if you
- need live readings ("how much is the oven drawing right now?"), or
- want automations to react to fast changes in power (e.g. surplus control), or
- already run a broker anyway and want all devices to go through MQTT.
Prerequisites
- WattWächter Plus set up and connected to WiFi — if not yet done, follow the Getting Started guide first
- A reachable MQTT broker with credentials — setting one up in Home Assistant is covered in Setting up an MQTT broker in Home Assistant
- The native integration is not set up in parallel (see Switching from the integration)
Step 1 — Set up the broker in Home Assistant
If you do not have an MQTT broker yet, set one up first — the guide applies to all WattWächter models:
➜ Setting up an MQTT broker in Home Assistant
Afterwards you will have the three details you need next: the IP address of the Home Assistant server, a username and a password.
Step 2 — Enable MQTT on the WattWächter
MQTT is disabled by default. You can enable it from the web interface, the smartphone app, the cloud portal or the REST API — see Settings → MQTT. In the app you will find the settings under Settings → MQTT.
For a broker running in Home Assistant, enter:
| Field | Value |
|---|---|
| MQTT | on |
| MQTT Host | IP address of the Home Assistant server, e.g. 192.168.178.22 |
| MQTT Port | 1883 |
| TLS (encryption) | off — in its default configuration the Mosquitto add-on accepts unencrypted connections on port 1883 |
| Username / Password | the credentials from the broker guide |
| Update interval | as needed, e.g. 5 seconds for live readings (default: 60) |
| Topic prefix / Client ID | further down the list — leave unchanged |
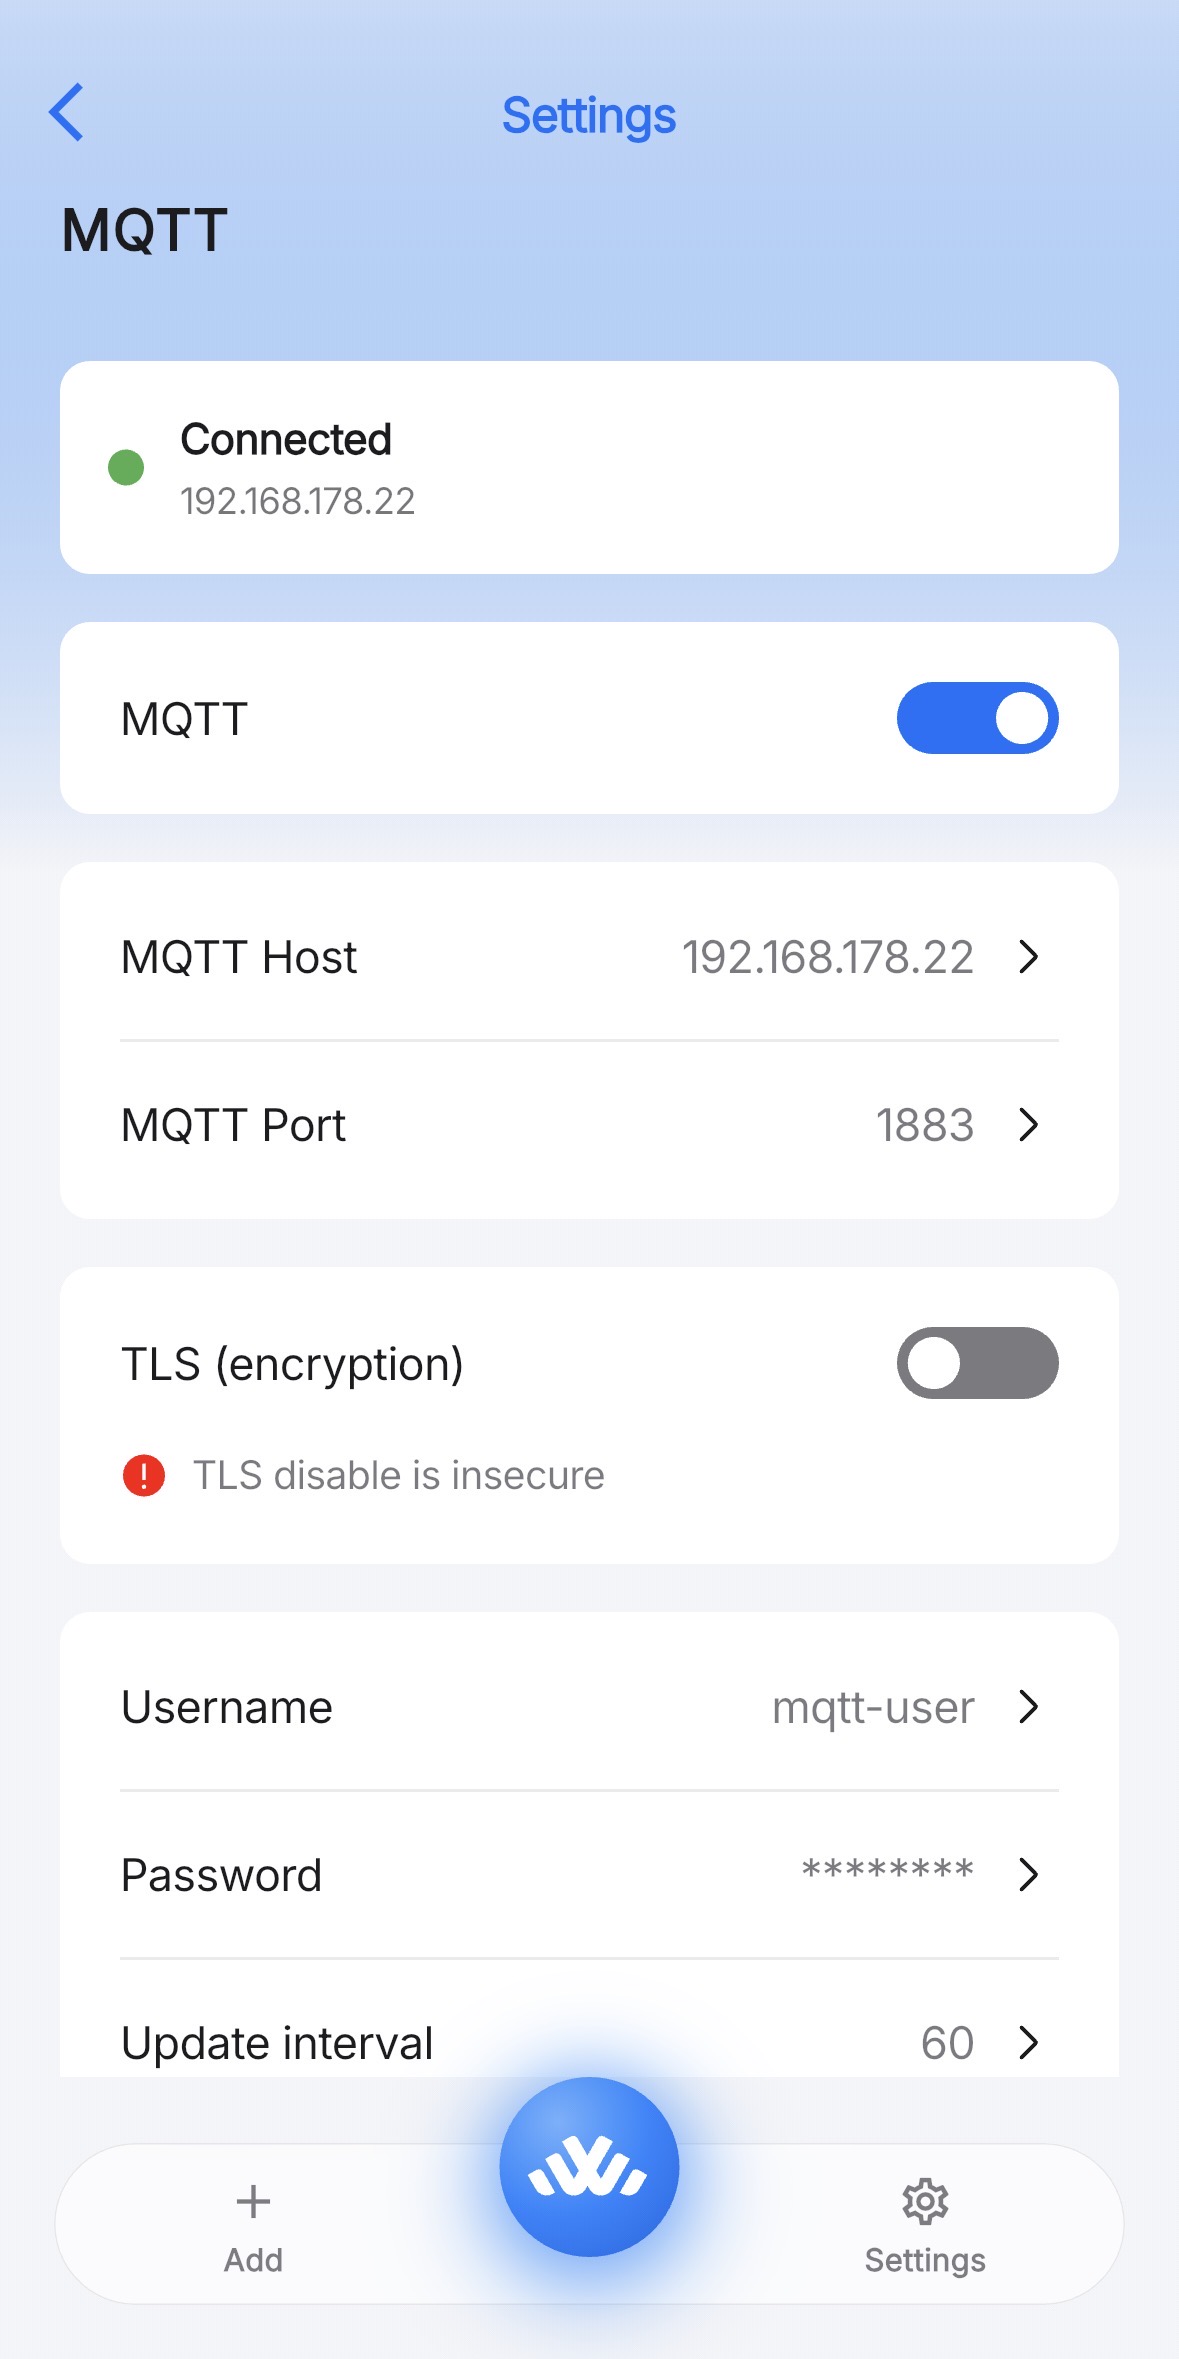
The changes take effect without a restart — the WattWächter reconnects immediately. The app then shows Connected at the top, with a green dot and your broker's address.
Don't forget TLS
The device defaults to port 8883 with TLS. The Mosquitto add-on, however, is only reachable unencrypted on 1883 out of the box. If you leave TLS on, the connection will never come up. Details and how to set up your own CA certificate are under Interfaces → MQTT → TLS Connection.
Step 3 — Check the device in Home Assistant
About two seconds after connecting, the WattWächter publishes its discovery messages. Home Assistant then automatically creates a WattWächter Plus device with one sensor per reading.
You will find it under Settings → Devices & Services → MQTT → Devices.
The energy sensors (1.8.0, 2.8.0) are marked as total_increasing with device_class: energy, so they can be used directly in Home Assistant's energy dashboard as grid consumption and feed-in.
Language of the entity names
The sensor names are generated by the device itself — they follow the language set in the device settings. After changing the language the new names apply from the next MQTT connection onwards; entities that already exist keep their name in Home Assistant.
Switching from the integration
If you have been running the native integration so far, remove it before switching, otherwise every reading appears twice:
- Settings → Devices & Services → WattWächter Plus
- Delete from the three-dot menu
- Then set up MQTT as described above
Going the other way takes an extra manual step: the discovery topics are retained and are not removed automatically when MQTT is disabled — the device would otherwise linger in Home Assistant as a dead entry. How to delete them is described under Interfaces → MQTT → Home Assistant Auto-Discovery.
Troubleshooting
| Symptom | Cause and fix |
|---|---|
| No device in Home Assistant, but the broker is reachable | Is the MQTT integration running? Check under Settings → Devices & Services → MQTT whether the service reports Online. |
| The WattWächter does not connect | Usually TLS: port 1883 requires TLS off. GET /api/v1/mqtt/status reports the current state — see Status & Diagnostics. |
Not authorized in the broker log |
Wrong username or password, or the Home Assistant user was created without Allow login. See Troubleshooting in the broker guide. |
| Values arrive, but only every 60 seconds | That is the default publish interval. Adjust it under Publish Interval. |
| Every reading exists twice | The native integration is running in parallel — see Switching from the integration. |
To watch the raw data, mosquitto_sub works well; a ready-made example is under Interfaces → MQTT.
Further reading
Topic structure, payload format, TLS with your own CA certificate, reconnect behaviour and the diagnostic endpoints are fully documented under Interfaces → MQTT.