Setting up an MQTT broker in Home Assistant
For a WattWächter to deliver its readings to Home Assistant via MQTT, Home Assistant needs an MQTT broker. The easiest way is the official Mosquitto broker app, which runs directly on the Home Assistant server — no cloud and no extra hardware.
This guide sets up the broker once. It is device-independent: when you are done you have a running broker, a user account for the WattWächter, and the IP address of your Home Assistant server — everything you need on the device side afterwards.
What do I need this for?
- WattWächter Plus — as an alternative to the native integration, e.g. for shorter update intervals: Home Assistant (MQTT)
- WattWächter WiFi/USB — the usual route in Wi-Fi mode: Home Assistant (WiFi)
Prerequisites
- Home Assistant OS or Home Assistant Supervised — only these variants can install apps (formerly "add-ons")
- Administrator access to Home Assistant
Home Assistant Container/Core
These installation types have no app store. Run Mosquitto separately there (e.g. as a Docker container) and start at Step 5 — instead of core-mosquitto you then enter the hostname or IP of your own broker.
Step 1 — Install the Mosquitto app
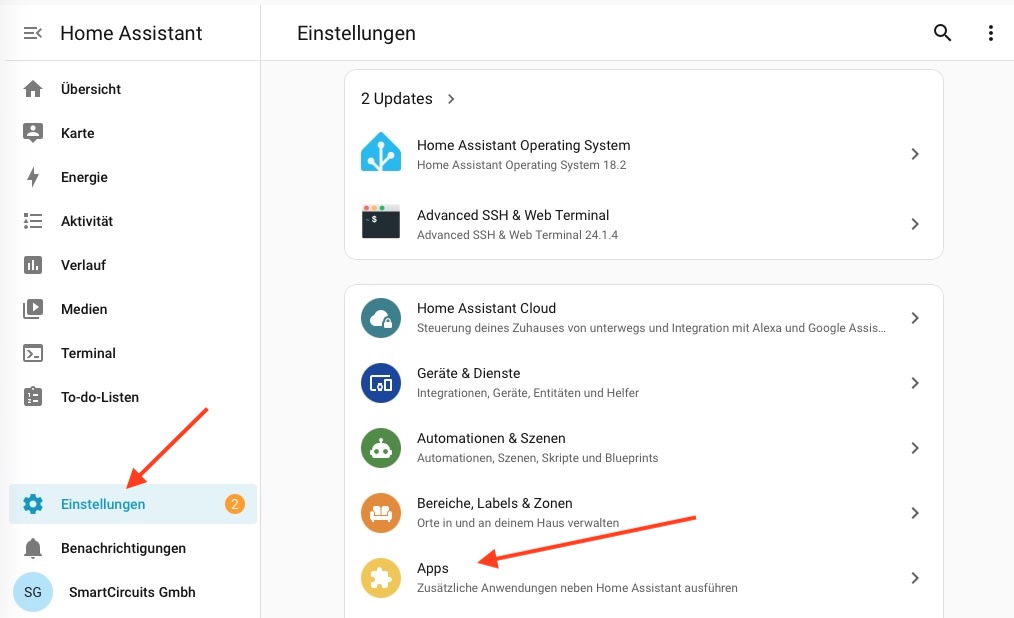
Open Settings → Apps.
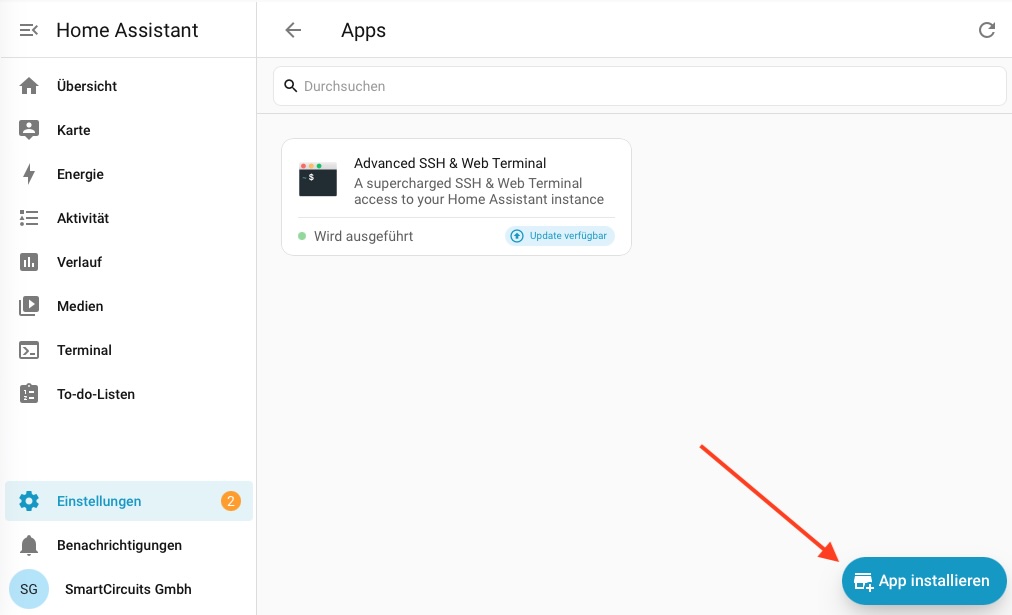
Click Install app in the bottom right.
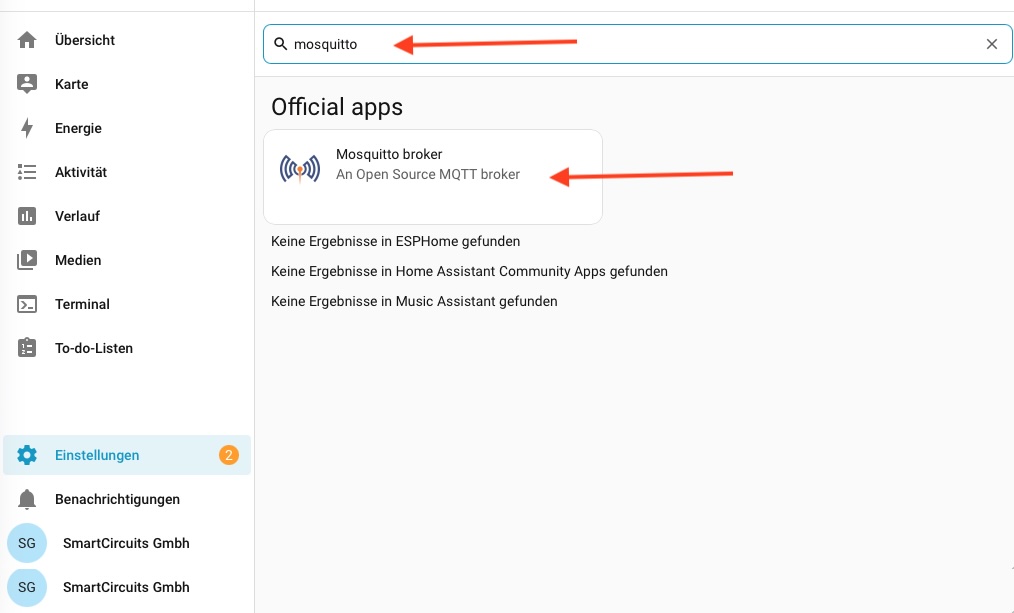
Search for mosquitto and select Mosquitto broker under Official apps.
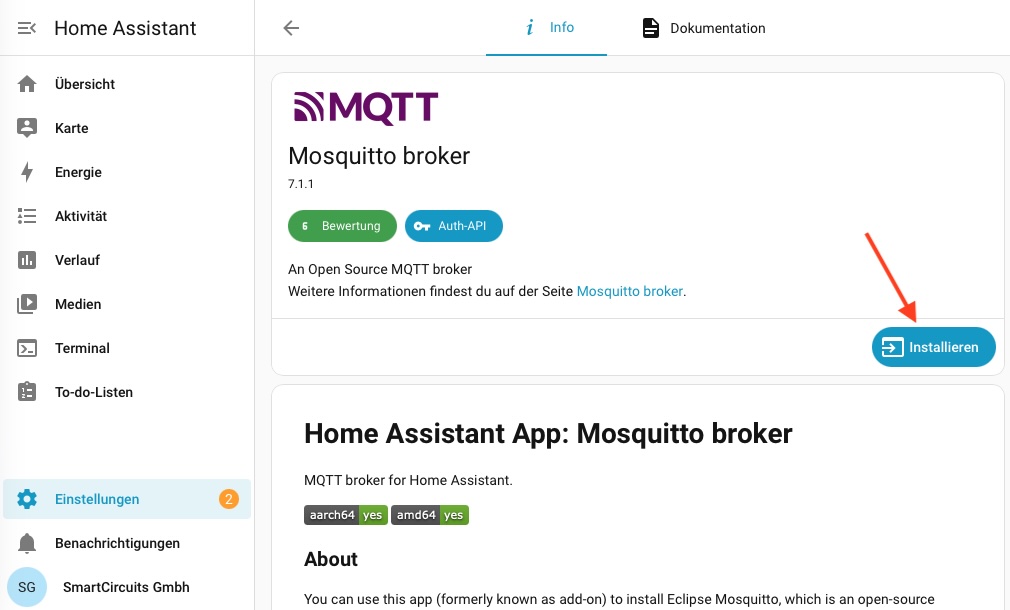
Click Install. Depending on your system this takes one to two minutes.
Step 2 — Start the broker
After the installation click Start and enable Start on boot so the broker survives a restart of the server.
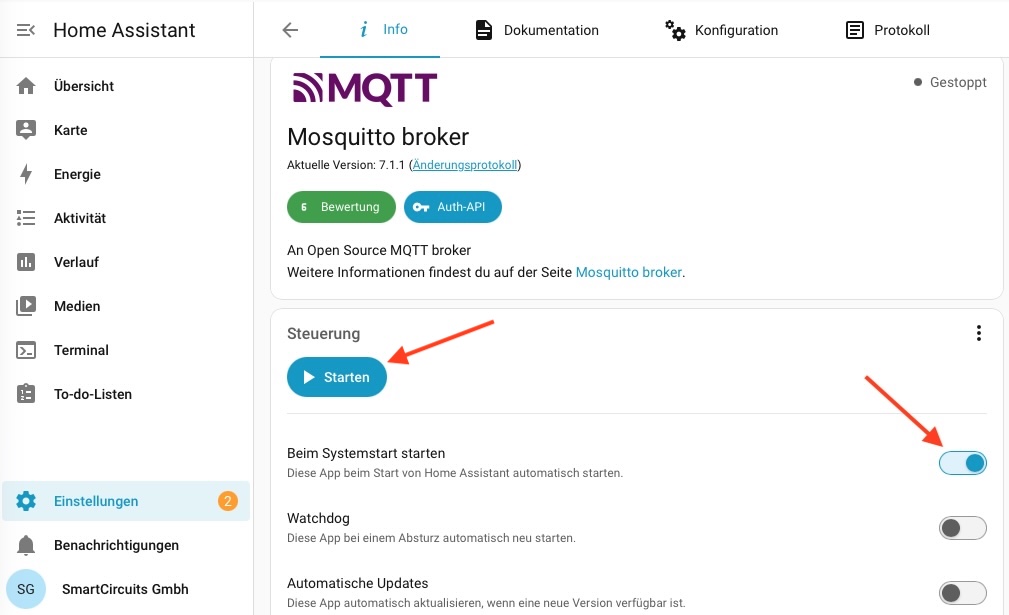
The app's default configuration is fine — there is nothing to change under Configuration.
Step 3 — Create a user for the WattWächter
The Mosquitto add-on uses Home Assistant user accounts as MQTT credentials. The WattWächter therefore needs an account of its own — Home Assistant will connect to the broker automatically in a moment, but it uses an internal service account for that, which you cannot enter in the device.
Open Settings → People.
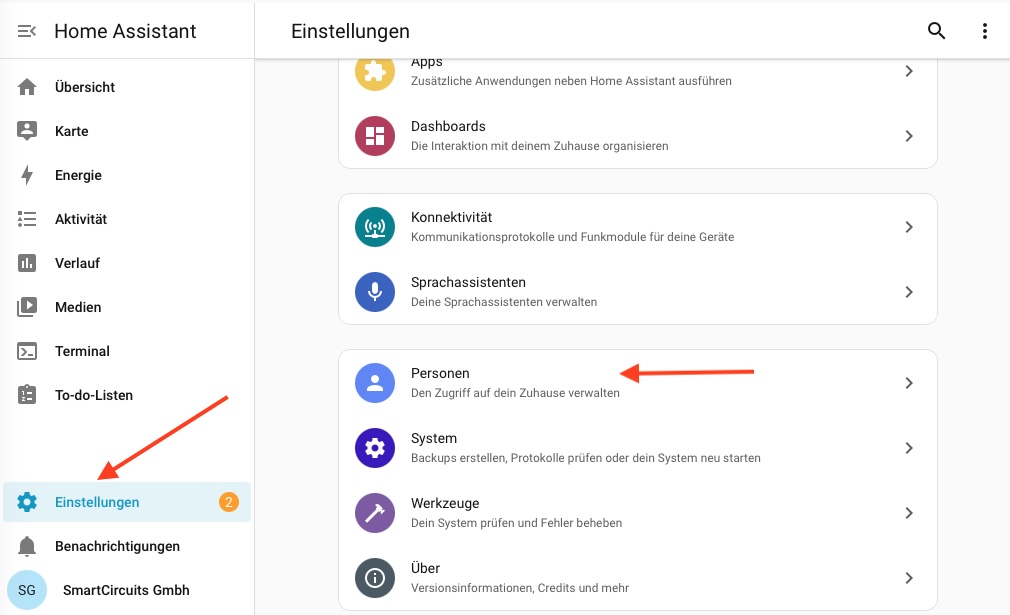
Click Add person in the bottom right.
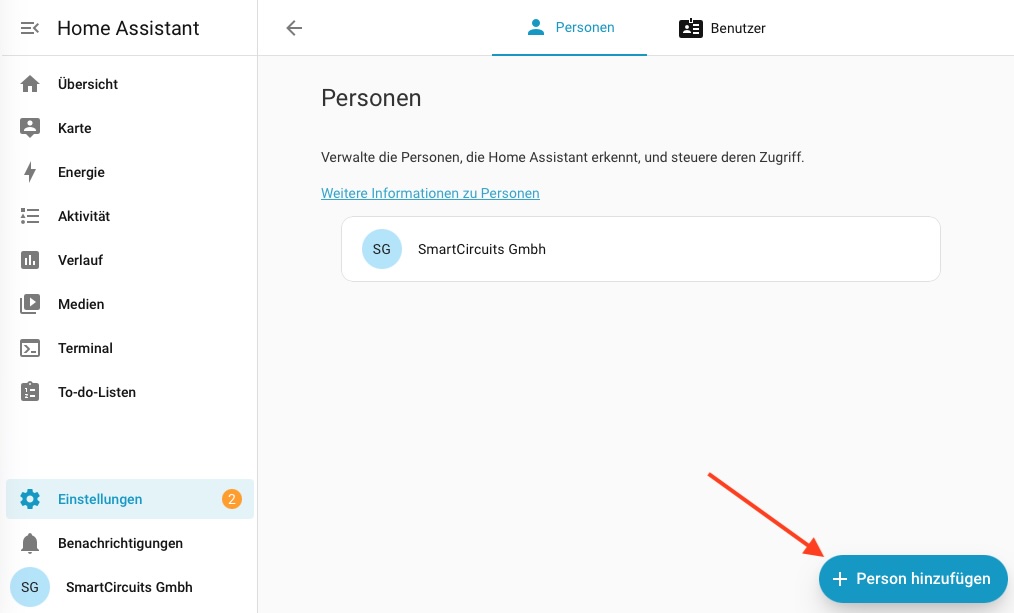
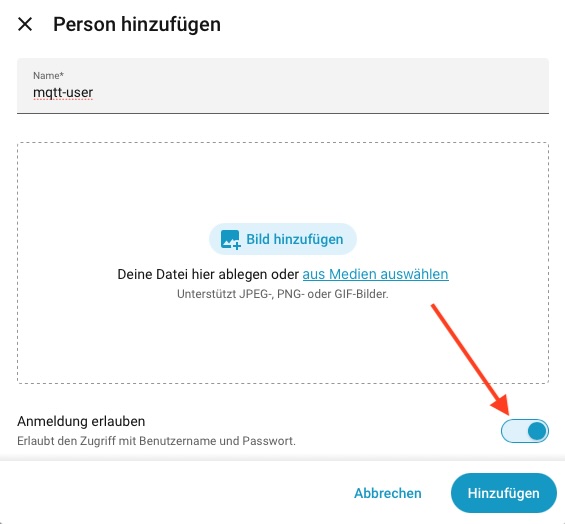
Enter a name, for example mqtt-user.
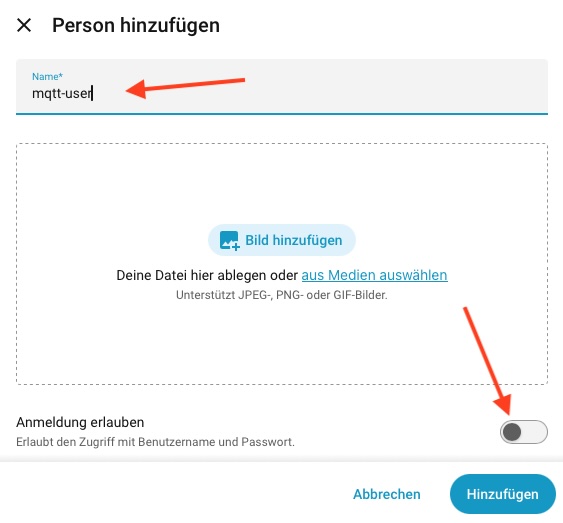
Enable Allow login — only this creates a real user account with a password.
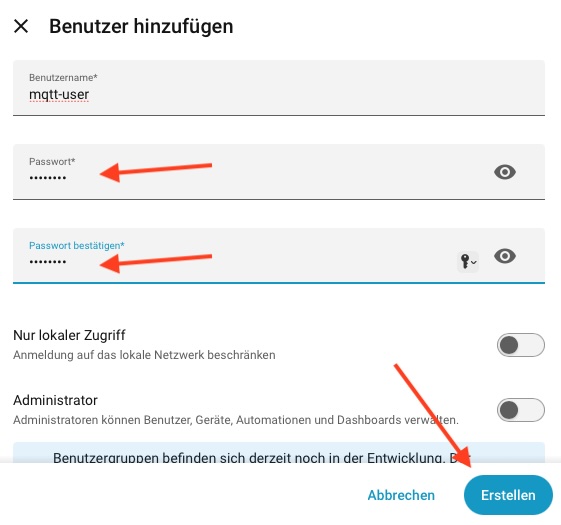
Enter a username and password and confirm with Create. Leave Administrator off — the account only needs to deliver MQTT data. Leave Local access only off as well.
Then close the dialog with Add. Note down the username and password — you will enter both in the WattWächter later.
Reserved usernames
homeassistant and addons are used by the add-on itself and do not work as an MQTT login. Pick a different name.
Step 4 — Restart Home Assistant
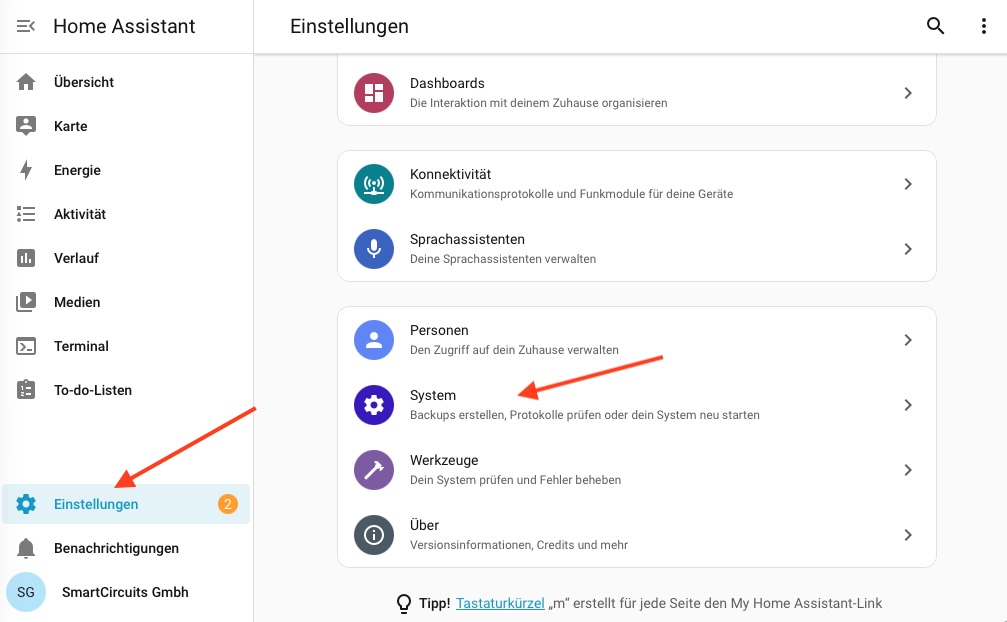
For the broker to learn about the new account, Home Assistant has to restart once. Open Settings → System.
Click the power icon in the top right.
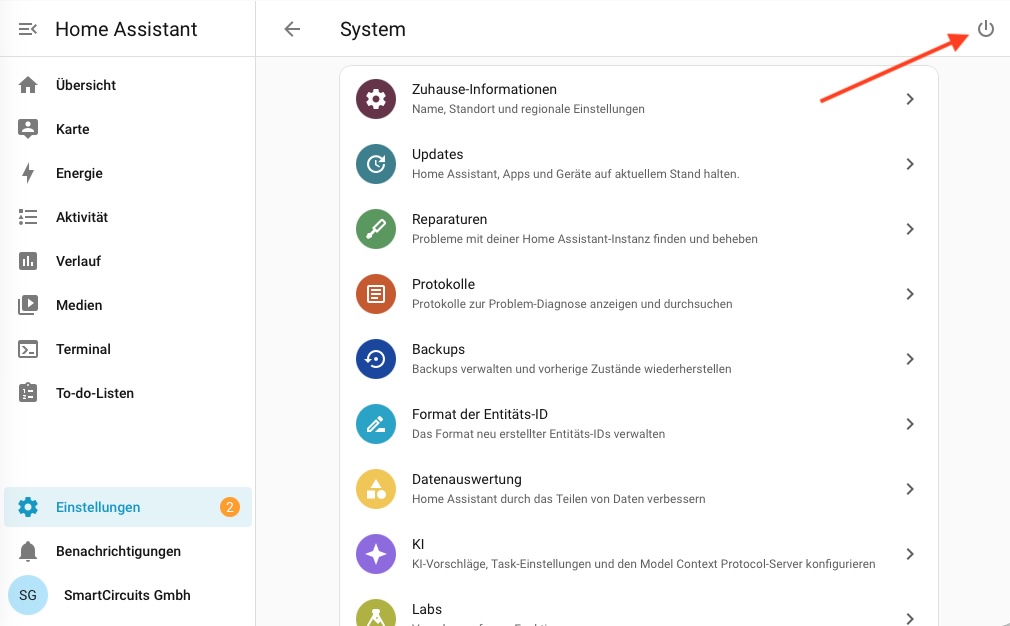
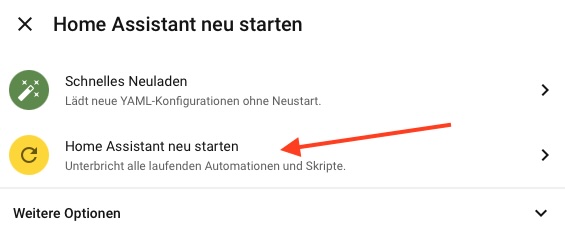
Choose Restart Home Assistant — "Quick reload" is not enough here.
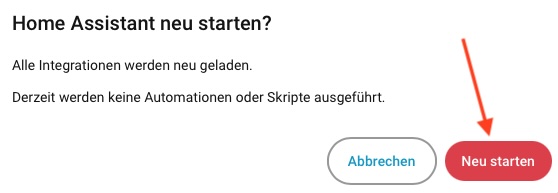
Confirm with Restart.
Step 5 — Add the MQTT integration
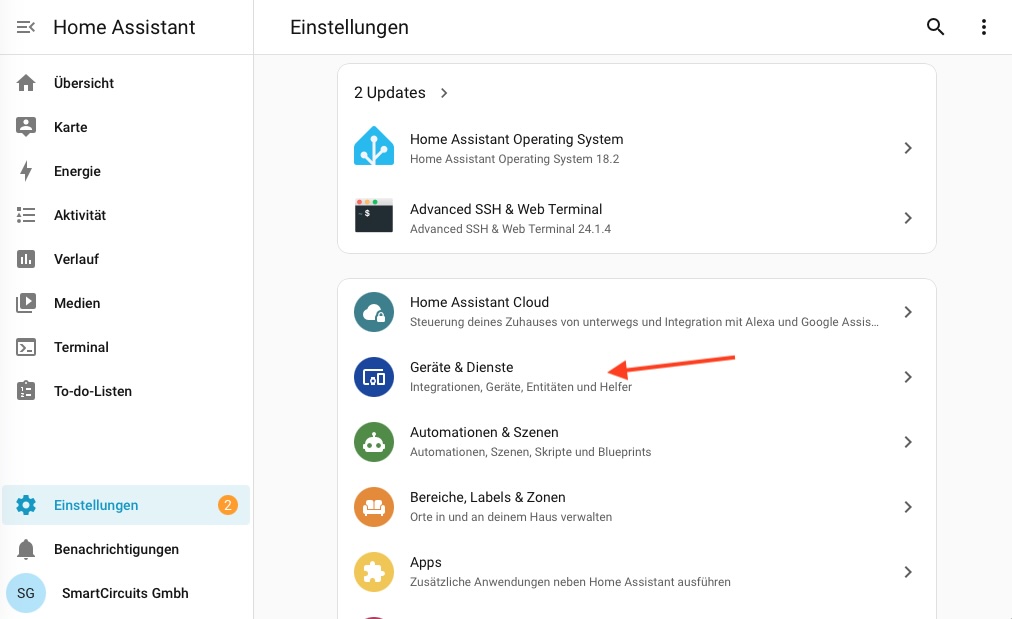
After the restart, open Settings → Devices & Services.
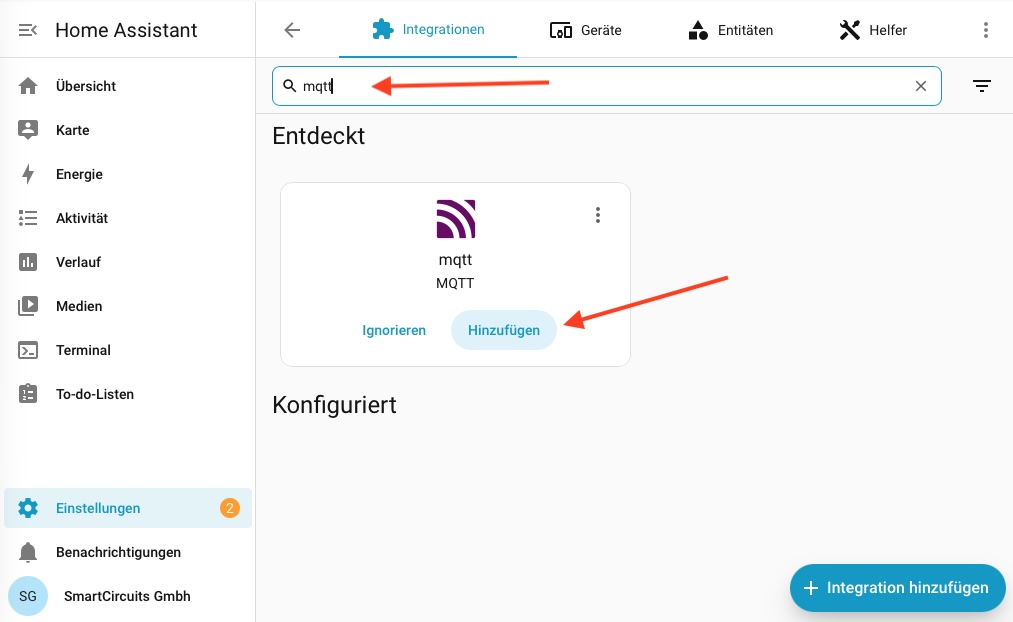
The MQTT integration is already waiting under Discovered — click Add.
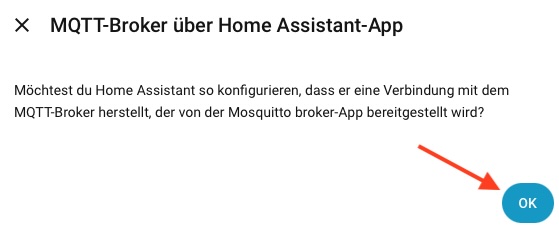
Home Assistant asks whether it should use the broker provided by the Mosquitto app. Confirm with OK.
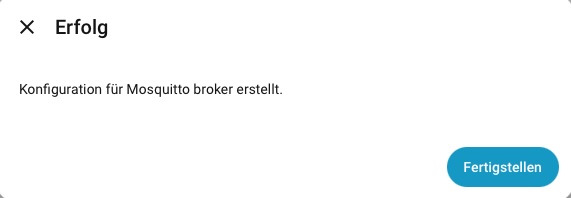
The connection is up — close with Finish.
Step 6 — Check the connection settings
This step is optional but recommended: it shows you the broker address and confirms that your new account works as an MQTT login.
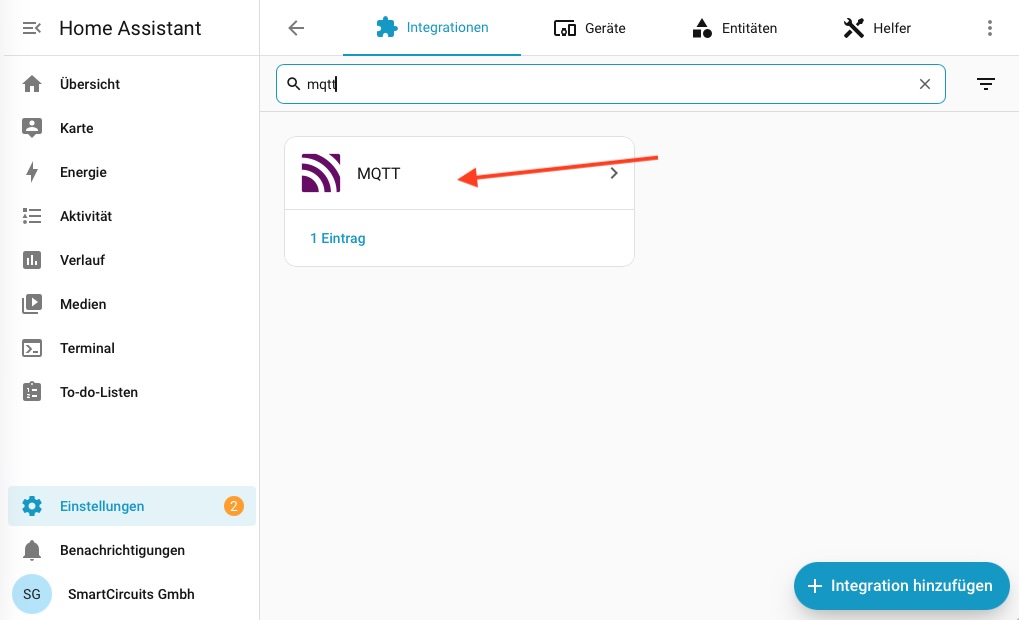
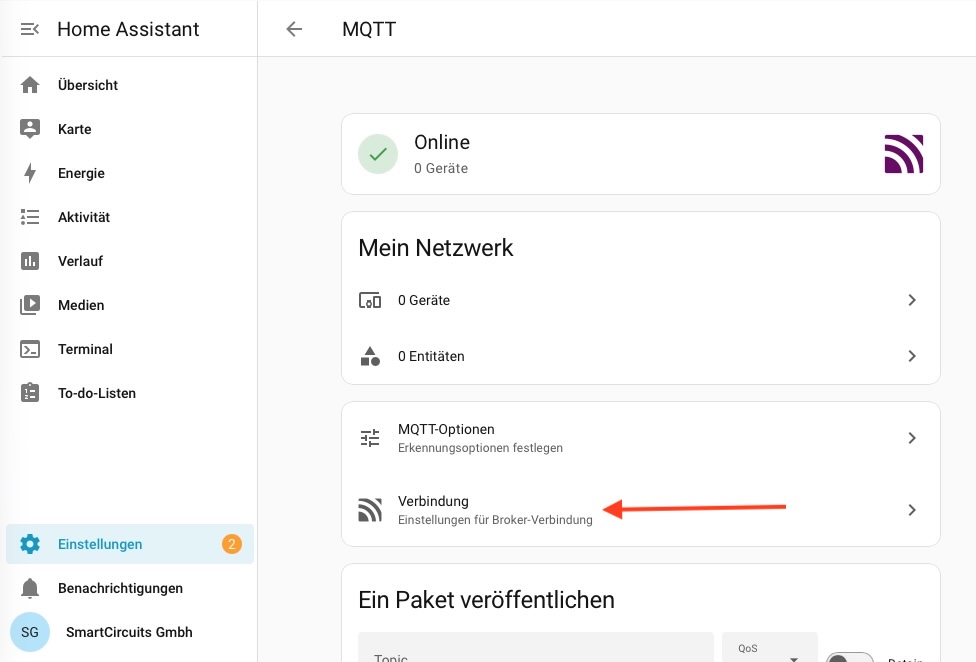
Open the MQTT integration.
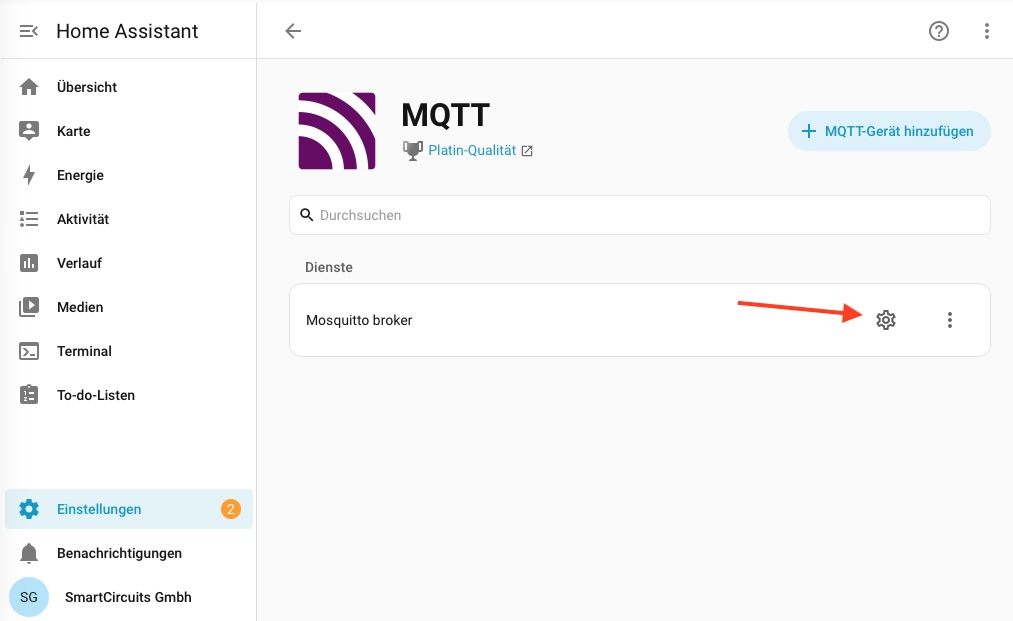
Click the gear icon next to the Mosquitto broker service.
Choose Connection.
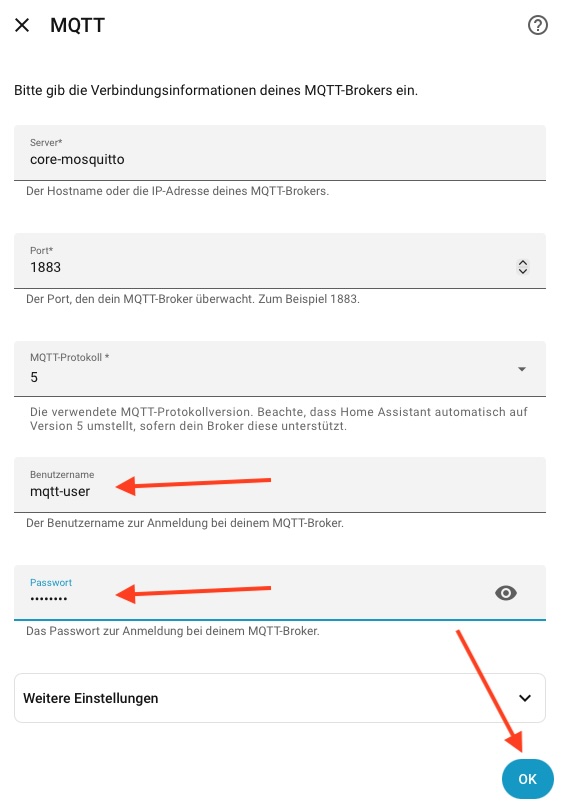
Enter the details of your new account and confirm with OK:
| Field | Value |
|---|---|
| Server | core-mosquitto |
| Port | 1883 |
| MQTT protocol | 5 |
| Username | your account from step 3, e.g. mqtt-user |
| Password | the matching password |
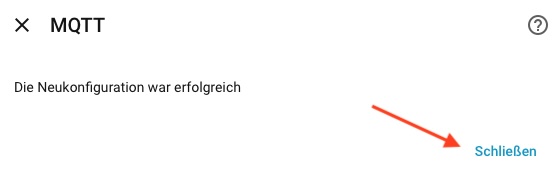
If Reconfiguration was successful appears, the account is valid — which means it will work in the WattWächter too.
Do not delete this account later
From now on Home Assistant connects using this account itself. If you delete the user later, Home Assistant's broker connection breaks as well. To avoid that, skip this step — the automatic configuration from step 5 then stays in place. Either way you still need the account for the WattWächter.
Step 7 — Find the server's IP address
The WattWächter cannot reach the broker at core-mosquitto — that name only exists inside Home Assistant. In the device you enter the IP address of your Home Assistant server.
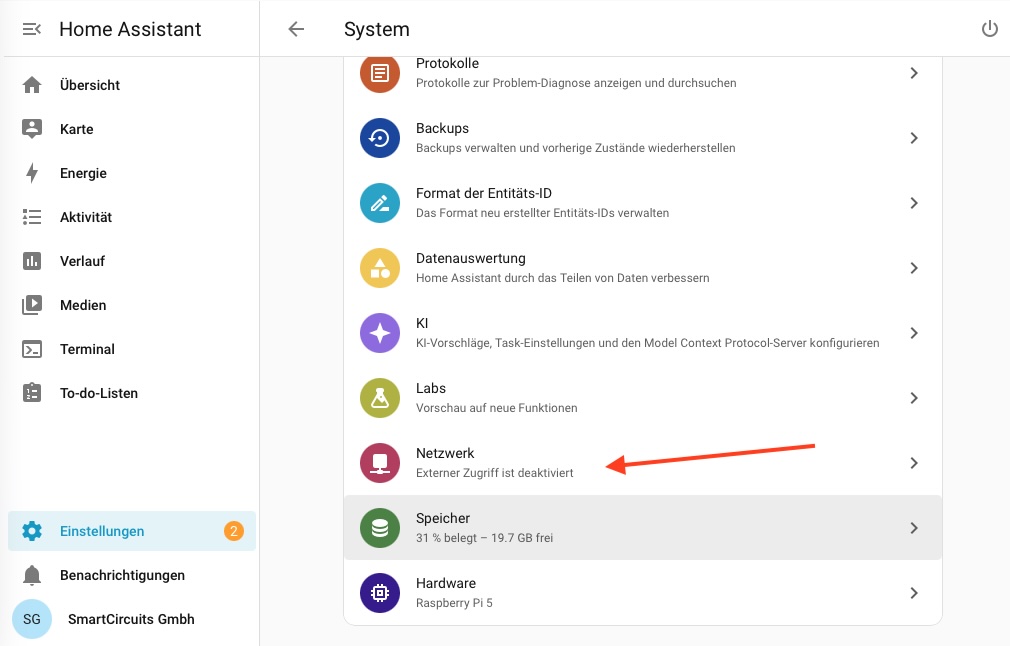
Open Settings → System.
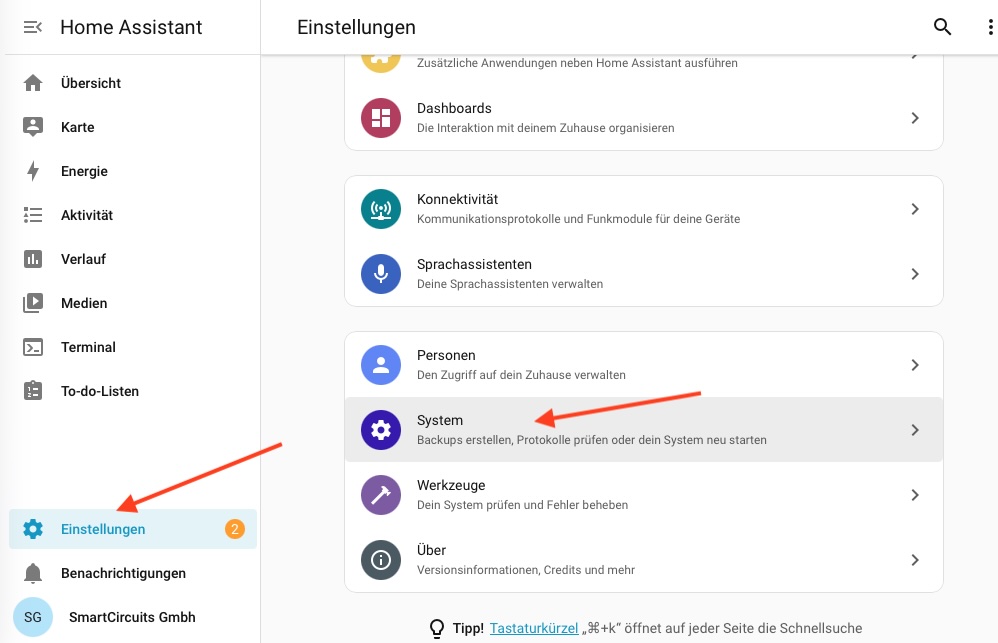
Choose Network.
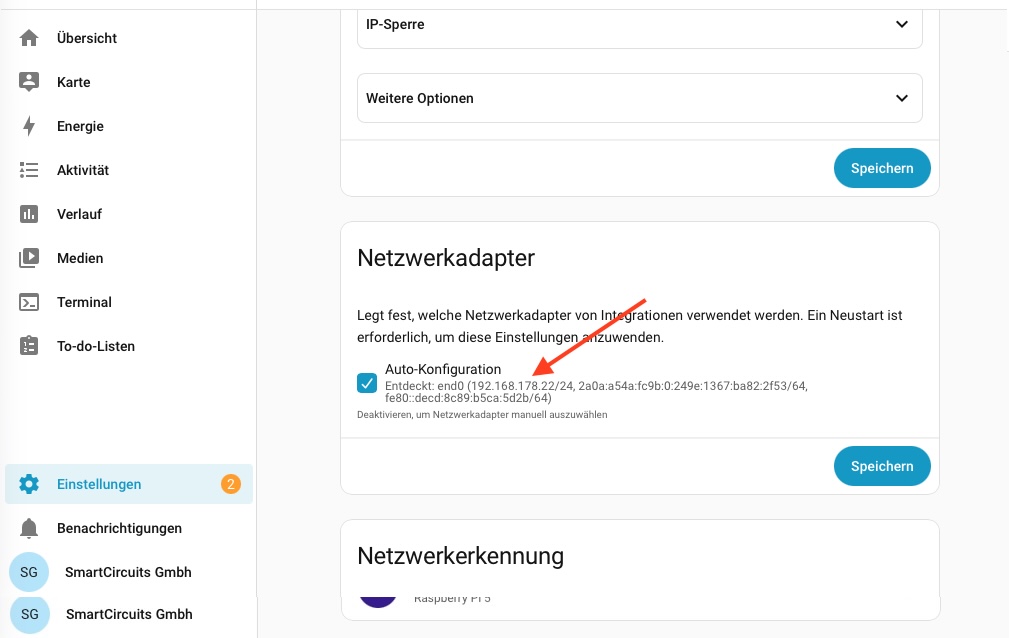
Under Network adapter the IP address is shown after Detected — 192.168.178.22 in the example. Note it down.
Assign a static IP address
If the IP of your Home Assistant server changes, the WattWächter loses its connection to the broker. It is best to reserve the address for the server in your router.
Done — what's next?
You now have everything you need:
- a running MQTT broker on the Home Assistant server
- username and password for the WattWächter
- the IP address of the server as the broker host, port
1883
Continue on your device's page:
Your own broker outside Home Assistant
If you already run a broker (e.g. Mosquitto on a Raspberry Pi, EMQX or HiveMQ), you do not need the Mosquitto app. Enter its hostname or IP, port and credentials in step 6 — and the same details in the WattWächter later.
Keep in mind:
- The user for the WattWächter is then created in the broker, not in Home Assistant.
- If you maintain an ACL file, the WattWächter needs write access to the topics it publishes to — the device page tells you which ones those are.
Troubleshooting
| Symptom | Cause and fix |
|---|---|
| The MQTT integration is not suggested under Discovered | Is the Mosquitto app actually running? Check its status under Settings → Apps → Mosquitto broker. Otherwise add it manually via Add integration → MQTT. |
Login fails (Not authorized) |
The user does not exist or was created without Allow login. Check it under Settings → People → Users. A restart is required after creating it (step 4). |
| Login fails despite the correct password | The username is homeassistant or addons — both are reserved. Create an account with a different name. |
| The device loses its connection sporadically | The Home Assistant server's IP keeps changing. Reserve the address in your router. |
You will find the broker's log under Settings → Apps → Mosquitto broker → Log. Every connection attempt shows up there with its username and result — the fastest way to narrow down credential problems.