MQTT
The WattWächter Plus can publish its meter values as MQTT telemetry to any MQTT broker — suitable for Home Assistant, ioBroker, openHAB, Node-RED and any other system with an MQTT client.
Home Assistant Auto-Discovery
Sensors are announced automatically via Home Assistant MQTT discovery and appear as device entities without any manual YAML configuration. See Home Assistant Auto-Discovery below.
Prerequisites
- WattWächter Plus set up and connected to WiFi — if not yet done, see Getting Started first
- A reachable MQTT broker (e.g. Mosquitto, EMQX, HiveMQ, the Home Assistant add-on broker)
- For TLS: a matching CA certificate — see TLS connection below
Enable MQTT
MQTT is disabled by default. You can enable and configure it through all four configuration paths — web interface, smartphone app, Cloud Portal or REST API (see Settings for the general introduction). The minimum required values are:
- Enabled →
true - Broker hostname → DNS name or IP of the broker
- Port →
1883(unencrypted) or8883(TLS, default)
Optional, depending on broker setup:
- Username / password (stored encrypted on the device)
- Custom client ID (default: the device ID
wattwaechter-XXXXXXXXXXXX) - Custom topic prefix (see Topic structure)
- Adjust publish interval (see Publish interval)
- Disable TLS if the broker is only reachable unencrypted
- CA certificate for self-signed brokers (see TLS connection)
Changes are applied without rebooting — the WattWächter reconnects immediately.
Topic Structure
All topics live under a configurable topic prefix. The default is:
WattWaechter/{client_id}
{client_id} defaults to the device ID (wattwaechter-XXXXXXXXXXXX, the last 12 characters of the MAC). Both the prefix and the client ID can be overridden in settings.
| Topic | Content | Retained |
|---|---|---|
{prefix}/status |
online after a successful connection |
yes |
{prefix}/{obis} |
Current meter value (see payload format) | yes |
homeassistant/sensor/{client_id}_{obis_}/config |
Home Assistant discovery definition | yes |
Example topics for a device with ID wattwaechter-aabbcc112233:
WattWaechter/wattwaechter-aabbcc112233/status                        → online
WattWaechter/wattwaechter-aabbcc112233/1.8.0                         → 12345.678
WattWaechter/wattwaechter-aabbcc112233/2.8.0                         →    42.123
WattWaechter/wattwaechter-aabbcc112233/16.7.0                        →   -812.4
homeassistant/sensor/wattwaechter-aabbcc112233_1_8_0/config          → {JSON}
OBIS format in topics
The value topic uses the OBIS short form with dots (e.g. 1.8.0). The discovery topic replaces dots with underscores (1_8_0) because dots are not allowed in Home Assistant discovery topics.
Payload Format
Published meter values are raw float values as ASCII strings, without any JSON wrapper. Example: 12345.678. The number of decimal places depends on the value type (3 or 4 digits).
A list of all published OBIS codes is in the Device overview. Which values are actually published depends on the meter and the enabled OBIS codes.
Publish Interval
Controls the time between two telemetry publishes — i.e. how often the current meter values are sent to the broker.
| Value | |
|---|---|
| Default | 60 s |
| Minimum | 1 s |
| Unit | seconds |
Very short intervals produce proportionally more network and broker load and are rarely needed for energy monitoring. For consumption statistics, 5–10 minutes is often enough. For live displays (e.g. "How much is the oven drawing right now?") 1–5 seconds makes sense.
Home Assistant Auto-Discovery
As soon as MQTT is active and the WattWächter has connected to the broker, Home Assistant discovery messages are published automatically for each known OBIS value. Home Assistant recognises the device as a WattWächter Plus without any manual YAML and creates a sensor per value.
Example discovery payload (for 1.8.0 – total energy in):
{
  "name": "Active Energy (A+R+)",
  "state_topic": "WattWaechter/wattwaechter-aabbcc112233/1.8.0",
  "device_class": "energy",
  "unit_of_measurement": "kWh",
  "state_class": "total_increasing",
  "unique_id": "wattwaechter-aabbcc112233_1_8_0",
  "device": {
    "identifiers": ["wattwaechter-aabbcc112233"],
    "name": "Wattwächter",
    "manufacturer": "SmartCircuits GmbH",
    "model": "WattWächter Plus"
  }
}
Discovery topics are retained — Home Assistant rediscovers the device immediately after a restart. They are published about 2 seconds after a successful connection and are not removed automatically when MQTT is later disabled. If you want the device to disappear from Home Assistant, delete the discovery topics manually (e.g. mosquitto_pub -r -n -t homeassistant/sensor/.../config).
Conflict with native HA integration
If the native Home Assistant integration is running in parallel, you will get duplicate entities without any warning from Home Assistant. Use only one of the two sources.
TLS Connection
The default port is 8883 with TLS. The WattWächter verifies the broker certificate against a built-in CA bundle containing the common public root certificates.
For purely local brokers TLS can also be turned off entirely — the WattWächter then uses port 1883 unencrypted.
Uploading your own CA certificate
If you run a broker with a self-signed certificate or your own internal CA (typical for Mosquitto on a home network), the built-in bundle doesn't know the issuing CA and the handshake fails. For that case you can store your own CA certificate.
It is appended, not substituted
The uploaded certificate is appended to the built-in bundle, so connections to brokers with publicly signed certificates keep working. The reverse matters too: the bundle is shared device-wide and is also used for OTA updates and the cloud connection, not just MQTT.
No field in the settings — but no command line required either
The settings page has no upload field for certificates; this goes through the REST API. That does not mean you need a terminal: the API Explorer in the web interface provides ready-made forms for all three endpoints — see below.
File requirements
| Criterion | Value |
|---|---|
| Format | PEM — the file must contain -----BEGIN CERTIFICATE----- and -----END CERTIFICATE----- |
| Maximum size | 8192 bytes; anything larger is rejected with 400 |
| Count | one upload slot. Another POST overwrites the existing certificate |
| Storage | /user_ca.pem in device storage — survives reboots |
The certificate is not split into individual certificates, so you can also upload several concatenated PEM blocks in one file (intermediate plus root), as long as you stay under 8 KB.
A factory reset deletes it
Resetting the device to factory defaults removes the stored certificate. You have to upload it again afterwards.
Using the API Explorer
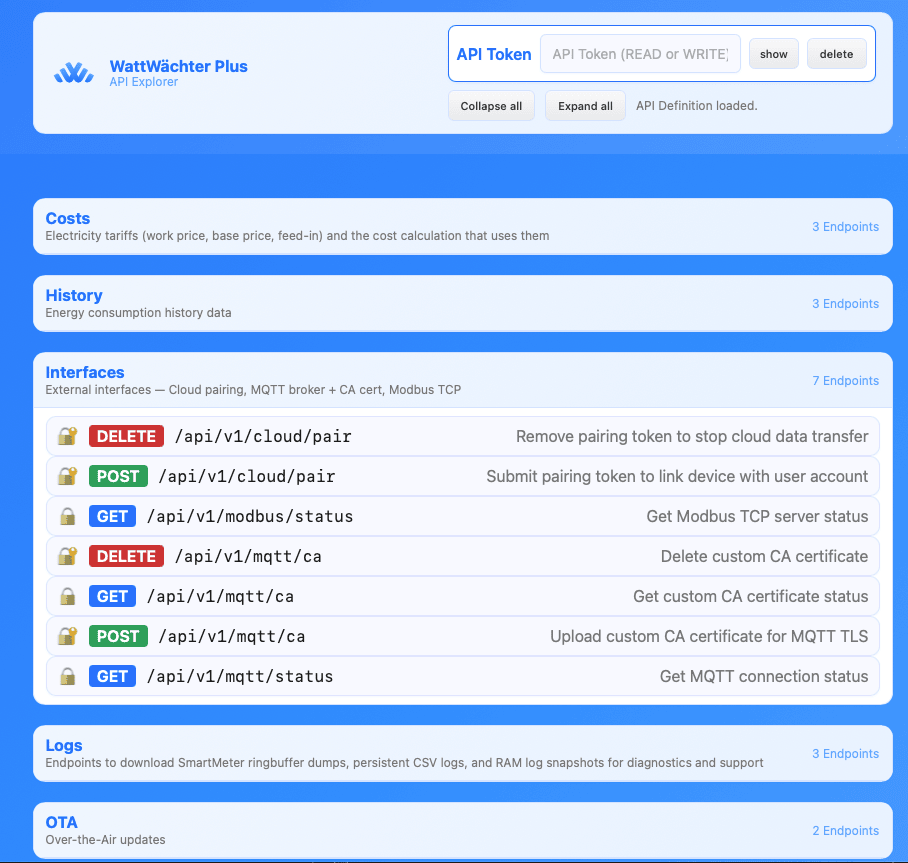
The most convenient route if you only need to install the certificate once. Open the WattWächter's web interface and click API Explorer. The three CA endpoints are in the Interfaces group:
If API authentication is enabled, first enter a WRITE
token in the API Token field at the top right — otherwise the device answers with
401.
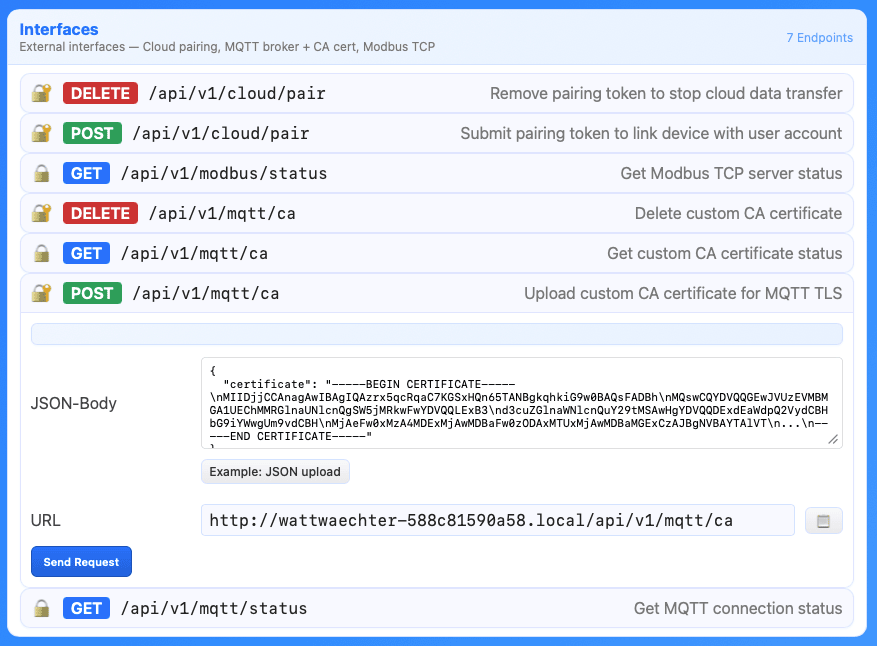
Then expand POST /api/v1/mqtt/ca. The Explorer shows a JSON-Body field and below
it an Example: JSON upload button that inserts a ready-made skeleton. Replace the
example certificate text with your own and click Send Request:
Line breaks as \n
Inside the JSON body the PEM has to be on a single line, with line breaks written
as \n — exactly the way the inserted example shows it. Pasting the file contents
with real line breaks is not valid JSON and you get Invalid JSON back. To avoid
that, use the curl route with text/plain below.
Uploading with curl
Two content types are accepted. As JSON, with the PEM in the certificate field:
curl -X POST http://wattwaechter-XXXXXXXXXXXX.local/api/v1/mqtt/ca \
  -H "Authorization: Bearer WRITE_TOKEN" \
  -H "Content-Type: application/json" \
  -d '{"certificate": "-----BEGIN CERTIFICATE-----\nMIID...\n-----END CERTIFICATE-----"}'
Or — usually more practical — the PEM file as raw text, which saves you from escaping line breaks:
curl -X POST http://wattwaechter-XXXXXXXXXXXX.local/api/v1/mqtt/ca \
  -H "Authorization: Bearer WRITE_TOKEN" \
  -H "Content-Type: text/plain" \
  --data-binary @my-broker-ca.pem
Response on success — bundle_size is the built-in bundle including your certificate:
{ "success": true, "message": "Certificate added", "bundle_size": 7500 }
Takes effect on the next connection attempt
An existing MQTT connection keeps running with the bundle it was established with. The new certificate is picked up on the next reconnect — force one by switching MQTT off and on again in the settings, or by restarting the device.
Checking the status
In the API Explorer, just click GET /api/v1/mqtt/ca and Send Request — this
endpoint needs no body:
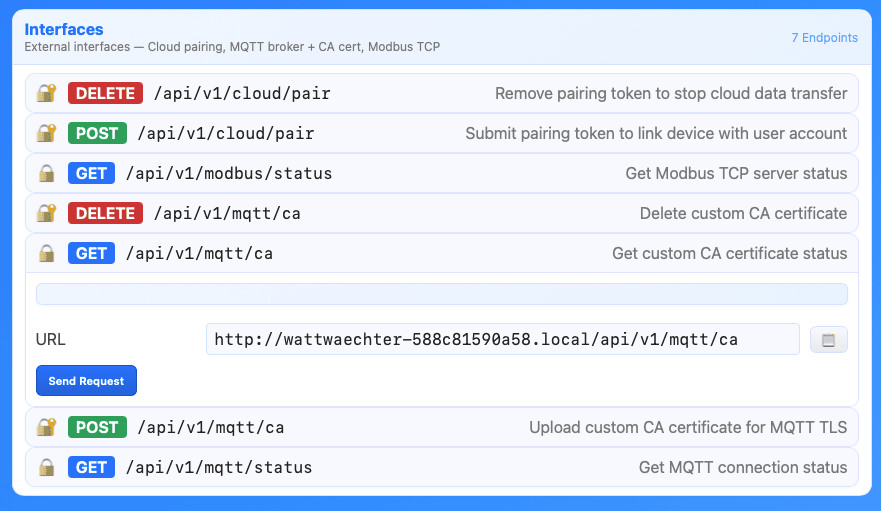
Or with curl:
curl http://wattwaechter-XXXXXXXXXXXX.local/api/v1/mqtt/ca \
  -H "Authorization: Bearer READ_TOKEN"
{ "has_custom_cert": false, "bundle_size": 5750, "custom_size": 0 }
| Field | Meaning |
|---|---|
has_custom_cert |
true if a custom certificate is stored |
bundle_size |
Size of the effective bundle in bytes (built-in + custom) |
custom_size |
Size of the custom certificate in bytes, otherwise 0 |
Renewing and removing
To renew or replace, simply POST the new certificate — it replaces the old one.
A prior DELETE is not needed.
If the stored certificate expires, the TLS handshake fails and the WattWächter ends up in
its reconnect backoff. You can see this via
GET /api/v1/mqtt/status, see Status & Diagnostics.
To remove it, again via the API Explorer using DELETE /api/v1/mqtt/ca:
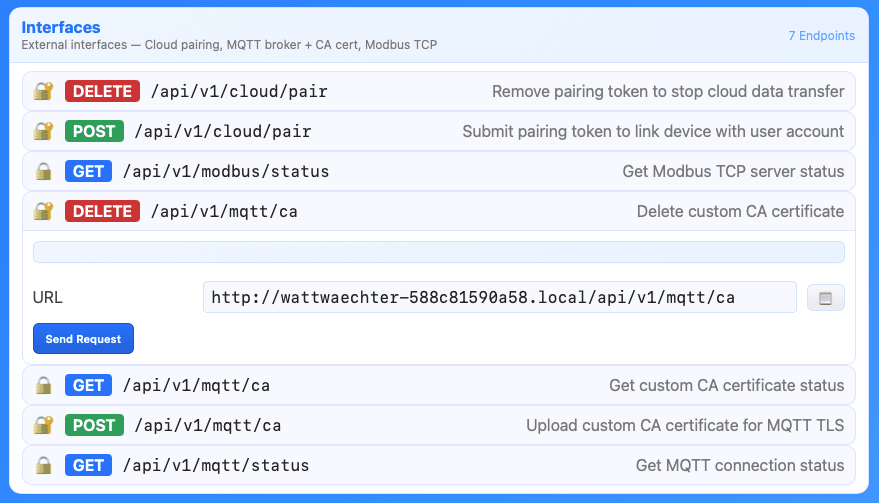
Or with curl:
curl -X DELETE http://wattwaechter-XXXXXXXXXXXX.local/api/v1/mqtt/ca \
  -H "Authorization: Bearer WRITE_TOKEN"
{ "success": true, "message": "Custom certificate deleted", "bundle_size": 5750 }
If no custom certificate was stored, the device answers with 404:
{ "success": false, "error": "No custom certificate to delete" }
Upload error messages
All with HTTP status 400:
error |
Cause |
|---|---|
Missing request body |
The request had no body |
Content-Type must be application/json or text/plain |
A different content type was set |
Invalid JSON |
Body is not valid JSON (only with application/json) |
Missing 'certificate' field |
JSON without the certificate field |
Failed to add certificate. Check PEM format. |
BEGIN/END markers missing, file empty, or over 8192 bytes |
The endpoints need tokens when API authentication is
enabled: GET a READ token, POST and DELETE a WRITE token.
Authentication
Optional via username + password. Both fields are AES-encrypted before being written to device storage and are only decrypted at runtime — they cannot be read back in plaintext via the REST API.
Leave both fields empty if your broker allows anonymous connections.
Reconnect Behavior
If the connection drops, the WattWächter reconnects on its own. The wait time doubles after each failed attempt with ±25 % jitter:
1 s → 2 s → 4 s → 8 s → … → 256 s (cap)
After long outages (8 / 20 / 50+ consecutive failures) the cap is raised progressively up to 5 minutes to spare the broker.
Any change to the MQTT settings triggers an immediate reconnect with the new values.
Status & Diagnostics
The current connection state is exposed via GET /api/v1/mqtt/status (READ token):
{
  "enabled": true,
  "state": "CONNECTED",
  "host": "mqtt.example.com",
  "port": 8883,
  "client_id": "wattwaechter-aabbcc112233",
  "use_tls": true,
  "last_error": 0,
  "last_error_message": "",
  "reconnect_attempts": 0
}
Possible state values: OFF, INIT, CONNECTING, CONNECTED, WAIT_RETRY, FAILED.
Example: Subscribe with mosquitto_sub
# Stream all values of a device
mosquitto_sub -h mqtt.example.com -p 8883 \
  -t "WattWaechter/wattwaechter-aabbcc112233/#" -v

# Just the current power
mosquitto_sub -h mqtt.example.com -p 8883 \
  -t "WattWaechter/wattwaechter-aabbcc112233/16.7.0"